
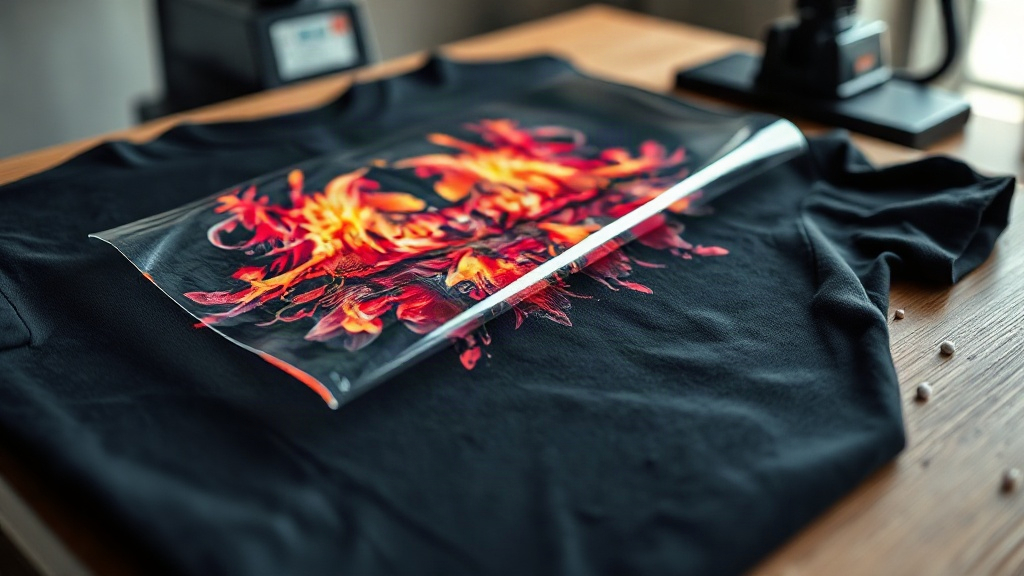
When you first hear about DTF transfers, you might think it's just another printing fad. But after pressing my first batch of shirts with this method, I realized it's a genuine shift in how we approach custom apparel. Unlike vinyl or screen printing, DTF (Direct to Film) transfers let you print full-color, intricate designs onto almost any fabric without the hassle of weeding or color limitations. In this guide, I'll walk you through everything I've learned from countless trials, errors, and successes, so you can decide if DTF is right for your next project.
What Are DTF Transfers?
DTF transfers are printed images on a special film that are then heat-pressed onto fabric. The process involves printing a design onto a PET film using a DTF printer, applying a TPU adhesive powder, and curing it. Once cured, the transfer is ready to be pressed onto garments. The magic lies in the adhesive: it bonds the ink to the fabric, creating a flexible, stretchable print that feels soft and lasts wash after wash.
I remember my first encounter with DTF at a local print shop. The owner showed me a shirt with a complex gradient design that would have been impossible with vinyl. That moment sold me. Since then, I've used DTF for everything from cotton tees to polyester blends, and the results have been consistently impressive.
Why Choose DTF Transfers Over Other Methods?
If you're familiar with screen printing or heat transfer vinyl (HTV), you know their limitations. Screen printing is cost-effective for large orders but requires separate screens for each color, making small batches expensive. HTV is great for simple designs but struggles with fine details and multiple colors. DTF transfers bridge the gap.
- No color limits: Print photorealistic images with millions of colors in one pass.
- No weeding: Say goodbye to tedious cutting and peeling. The printer does the work.
- Works on many fabrics: Cotton, polyester, blends, even leather and denim.
- Durable: Properly applied DTF transfers withstand dozens of washes without fading or cracking.
- Cost-effective for small runs: No setup fees, so you can order one or one hundred.
In my experience, DTF shines for small businesses and hobbyists who want professional results without investing in multiple machines. I've seen a home-based crafter produce shirts that look like they came from a commercial shop, all thanks to DTF.
The DTF Transfer Process Step by Step
1. Design Preparation
Start with a high-resolution image. Vector files are ideal, but 300 DPI raster files work too. Remember that DTF prints on a white base, so transparency in your design will become white. If you want the fabric color to show through, you'll need to simulate that in your design. I often add a subtle white outline to ensure the design pops on dark garments.
2. Printing
A DTF printer uses CMYK plus white ink. The white ink is printed first as a base, followed by the color layers. This order is crucial because the white base makes the colors vibrant on dark fabrics. The printer prints the design in reverse onto the film. If you're outsourcing, you'll receive the film ready to press. If you're printing yourself, ensure your printer is calibrated and the ink is fresh.
3. Powder Application
After printing, while the ink is still wet, you sprinkle TPU adhesive powder over the design. Shake off the excess, then cure the powder using a heat press or oven. The powder melts and bonds with the ink, creating a dry, slightly tacky surface. This step is what makes the transfer adhere to the fabric. I've found that using a dedicated powder shaker saves a lot of mess.
4. Curing
Curing is critical. You need to melt the powder completely without scorching the film. Typically, a heat press at 160°C (320°F) for 2-3 minutes works, but follow your powder's instructions. I once rushed this step and ended up with transfers that peeled after one wash. Lesson learned: don't skip the timer.
5. Pressing onto the Garment
Pre-press the garment to remove moisture. Place the transfer on the fabric with the design facing up. Press at 150-160°C (300-320°F) for 10-15 seconds with medium pressure. Peel the film while it's hot (hot peel) or cold (cold peel) depending on the film type. I prefer hot peel because it's faster and leaves a smooth finish.
Common Mistakes and How to Avoid Them
Even with the best equipment, things can go wrong. Here are pitfalls I've encountered and how to sidestep them:
- Insufficient pressure: Leads to poor adhesion. Adjust your press and test.
- Wrong temperature: Too low and the powder won't melt; too high and the film warps.
- Not pre-pressing: Moisture in the fabric causes steam, which ruins the bond.
- Using the wrong powder: TPU powder is specifically for DTF; don't substitute with other adhesives.
- Skipping a test press: Always test on a scrap piece before pressing your final garment.
I keep a notebook with settings for different fabrics. It's a lifesaver when I switch between cotton and polyester.
Design Tips for Stunning DTF Transfers
DTF gives you freedom, but a few design tweaks can elevate your results:
- Use high contrast: DTF excels with bold colors, but subtle gradients also work. Ensure your design has clear edges.
- Avoid very thin lines: Extremely fine details may not reproduce perfectly. A minimum line width of 1pt is safe.
- Consider the garment color: Since DTF includes a white base, your design will look the same on any color. But if you want a vintage look, you can adjust opacity in your design.
- Add a white underbase for dark shirts: Actually, DTF automatically includes a white base, so no extra step needed. But if you're printing on a light shirt and want a soft feel, you can request a thinner white layer.
Experiment with different finishes. I've used DTF to create metallic effects by adding a silver layer in the design, and it looked fantastic.
DTF Transfers vs. Other Printing Methods
Let's compare DTF to the most common alternatives:
- Screen Printing: Cheaper for large orders, but DTF wins for small batches and complex designs.
- Heat Transfer Vinyl (HTV): HTV requires weeding and layering, which is time-consuming. DTF is a single-step press.
- Direct to Garment (DTG): DTG prints directly onto fabric, but it's limited to cotton and requires pretreatment. DTF works on more fabrics and often has better durability.
- Sublimation: Sublimation only works on polyester and requires light-colored fabric. DTF is versatile.
For a small shop like mine, DTF offers the best balance of quality, cost, and flexibility.
Frequently Asked Questions About DTF Transfers
How long do DTF transfers last?
With proper application and care, DTF transfers can last 50+ washes. I've had shirts that went through a year of regular wear and still look great. Avoid fabric softener and wash inside out to extend life.
Can I use DTF transfers on polyester?
Yes, DTF works on polyester, cotton, blends, and even nylon. However, polyester requires lower pressing temperatures to avoid dye migration. I recommend 140°C (285°F) for polyester and a longer press time.
Do I need a special printer for DTF?
You need a DTF printer that uses pigment ink and white ink. Converted Epson printers are popular, but you can also outsource printing to a service. If you're just starting, outsourcing is a low-risk way to test the waters.
What is the best way to store DTF transfers?
Store them in a cool, dry place away from direct sunlight. Keep them flat or rolled, not folded, to prevent creases. I use a binder with plastic sleeves for small transfers.
Can I layer DTF transfers?
Yes, you can layer multiple transfers for a multi-dimensional look. Press the first transfer, then apply the second on top. Just be careful with alignment and use a cover sheet to protect the design.
DTF transfers have opened up a world of possibilities for custom apparel. Whether you're a hobbyist or a business owner, this technology delivers professional results without the steep learning curve. Give it a try, and you might just find your new favorite printing method.